Showing posts with label Digital Photography & Professional Re-touching. Show all posts

Wednesday, 6 May 2015

Final Images

These are my ten images for the final project. They signify nostalgic locations for me, prominently Taunton and Cornwall. 

 'Vivary Park - Taunton'

 'Bath Place - Taunton'

 'Town Centre - Taunton'

 'Dellers Wharf - Taunton'

 'Private Road - Taunton'

'Falmouth Harbour - Cornwall' 

'Falmouth High Street - Cornwall' 

'Pendennis Castle - Cornwall' 

 'Holiday Cottage - Cornwall'

'Pandora Inn - Cornwall'

Tuesday, 5 May 2015

Session 8 - Studio Work

After spending a lot of time taking photographs of outdoor environments or objects in ambient lighting, we were finally given the opportunity to take photos in the studio with controlled professional lighting. As we could control the lighting, there were plenty of good opportunities for some nice looking photos with unique looks and styles. 


I managed to capture a lot of diverse and varied photos as a result of the lighting. We also had a reflector in the room as evident in the first image as the main light source was coming from in front of the subject and is being reflected into her so that she has a nice half shadow/half lit up look. My personal favourite images were the first two and the 4th and 5th one because of how they use shadows and a shine around the subject (most prominent in the 4th photo). 

Composition

For our out-of-class assignment, we were given a list of shot types or specific textures. 

For this image, I had to find a pattern in the shape of an 'S' which I had actually seen before so I knew exactly what I was looking for when I set out on my shoot. It was more a matter of getting the quality of the image right.

Next was capturing symmetry and this was the main side of the memorial that was structured evenly on each side, therefore capturing a very nice symmetrical look. 

I thought that a good group of three shot would be to make three structures look line they are in a line through the use of perspective which I believe I did well. What also happened inadvertently was having the structures being in ascending order of height from left to right.  

My instant thought of a natural pattern was water. My biggest problem with that is that I had to keep the quality high as the water is constantly shifting so I had to use a high shutter speed to capture the motion clearly. 

On the way back from the water, it was perfectly timed as the sun was setting which meant that the poles around the area were leaving a great shadow that fit perfectly as a repeating pattern as well as diagonal lines thanks to the angle of the sun. A good combination of lighting and object placement.

Overall, these are some of my favourite photos that I have taken. Arguably some of them are context sensitive as I wouldn't have got such good photos if I wasn't in the right place at the right time (as clearly seen with the last photo) but there is a good variety of colour, texture and location within the image. These are images that I would gladly show people if asked what sort of work I had to do for Digital Photography as I feel they get the point across well with a variety of techniques based on composition. 

Session 7 - Bus Station

As a group, we went down to a near by bus station in order to not only take pictures that capture the essence of the location, but we also had to take images of textures that we can combine with the images for a new effect. 


Personally, these are my favourite images that I have created on this course, especially the first two. The way that the textures combine with the image are well done and I managed to blend it all together (such as the railing standing out in the first image). The second image was already a nice looking image with the focus on the chain with the buses in the background, however the added texture gives it a more defined look and makes it stand out. The third is an interesting one as it as the texture gives the impression that the camera is peering through a gap voyeuristically.

Wednesday, 29 April 2015

Session 6 - Touch up

For this exercise, we initially watched a video about a camera made from a van that was driving around capturing people in their environment. We were tasked with also taking photos of people within a fitting environment conveying it as a snapshot of life rather than a self aware photo. After doing so, we then took to Photoshop in order to edit the photo in a manner that we liked. I decided to blur the background so that the subject was the only bit of the photo in focus in order to make him stand out more. 


I'm happy with how the image turned out. It's interesting to see the contrast in the source photo and the final edited picture as the blurred background really does make the subject stand out. In terms of the content, I think I fulfilled the brief as seeing a student captured in college makes sense. I did have initial problems as I wasn't too sure which parts to blur out such as the table in front of the subject or the chair to his left but I ultimately put all the focus on him and him alone.

Wednesday, 22 April 2015

Session 5 - Photoshop

This session marked our first time actually having a go with Photoshop in order to edit our raw photos. This was the part I was looking forward to the most as I felt that I needed to improve my Photoshop skills as it seems like something that, as a film student, I really should need to know. So what we did was take a simple photo of a peer and then spent the rest of the session manipulating it in Photoshop for a desire effect.


As you can see, the subject stands out tremendously from the background and I have stylised him with harsher dark colours and an also comic book like edge around the details. I really like this effect as it makes the subject pop out instantly and your eye is only attracted to him and not the background. You'd have to focus hard to look at the background after I blurred it. Initially, I just wanted to blur the background but after learning more skills, I came out with this and it looks better for it. Masking was the most useful skill that I picked up from this session and I aim to make much more use of it in the future.

Wednesday, 8 April 2015

Session 4 - Putting Exposure Together

Now that we knew many new techniques and different ways of taking images, we were tasked with capturing examples of a variety of techniques as a way of conveying exposure and what exactly goes into it and the general look of a photo. We played with different camera settings, went to different locations with different lighting and focuses on certain objects in the environment with these photos being the result: 


This was my example of taking an image in a dark room while also having the camera under exposed. This led to the image being engulfed with darkness and shadows with no light around for the camera to capture. 

In contrast to this is having an image over exposed leading to an abundance of light which makes the detail in the image hard to make out and appears too bright as a result.  

This is my example of playing with depth of field. 


Example of Low Light.

For this image, I was required to show a pan and in order to do this, I lowered the shutter speed and panned up while the camera was processing. While subtle, there is an moving effect in the image. 

Clarity was required for this shot as I had to find a highly detailed subject and convey the detail for the image. Depth of field was a good option for this as well as combining it with focusing.

Finally, I had to capture motion blur in an image and so I again had to lower the shutter speed and take an image of the subject in motion. 

I think that this was one of the most helpful and interesting exercises we have done as we got to convey and try out a number of techniques that we have looked at. I can look at this group of photos for reference if I need to remind myself of what was exposure can be put together as well as just being the opportunity to capture come clear photos as well as ones with motion blur. There's a good variety of imagery here. 


Face Mash Up
 - After finishing this project, we then had to take pictures of three of our peer's faces and edit them into one in Photoshop. This was the result:


Wednesday, 1 April 2015

Session 3 - My Strange Life

For our out of class assignment, he had to capture a number of images that convey elements about ourselves. 

My Top Ten Films. As a film student, I wanted to get my love of film across first and I thought it would be best to show the DVD boxes for my ten favourite films. 

Capturing my gamer side with Nintendo Wii U and 3DS.

In order to convey part of my attitude towards distraction, I took an image of the state of my floor at the time of the project (thankfully now cleared).

As the topic was "My Strange Life", I wanted to have at least one bizarre image in this collection and so I went with a carton of Orange Juice with a smiley face drawn on it. Orange Juice is my favourite drink and I thought it would be a weird thing to bring up. My hand gently caressing the carton added to the effect.

My love of music conveyed by a CD case enveloping my iPod. 

My voicing acting set-up with microphone and pop filter. Out of all of my images for this assignment, this is my favourite. The focus is where it needs to be: on the mic and the filter. I also had to bring up my recording software on the laptop behind it. The depth of field is what makes the image work. 

Wednesday, 25 March 2015

Session 2 - Aperture and Shutter Speed

Aperture
For the exercise of our second session, we set off to make use of different aperture size and also changing our shutter speed.  For testing the aperture, we focused on a single subject for two images. One with the aperture high and the other with it low.


What I take away from this is how much of a difference on the lighting that the aperture can make. The contrast between the first two images in the folder is evidence of this as you can see just how bright the second image becomes once the aperture is made higher as more light is allowed into the camera.

Shutter Speed
In order to test the shutter speed, we had to take a couple of images conveying movement. We did this by having the shutter speed low and moving the camera while it took the image.


The effect that I got was really interesting as it seemed to stretch out the light in the shot while maintaing some of the shapes in the image. This is especially apparent in the first image where we can still make out the stair banister, the window and the landing above however the light is stretched out much more while the second image, because the subject has a glass case, the case just appears to be submerged in light. 

Monday, 23 March 2015

Session 1 - Basic Principles of Photography

Light
 - A source of light is required in order to take a photography. Whether it be natural lighting or artificial light, there are four terms for lighting that can be used: Reflected light, Transmitted light, Soft light and Hard light. The difference between hard and soft light is about how many shadows you want in the image. Hard lighting will cause an abundance of shadows while there will be significantly less in soft light.

Medium
 - Throughout history, the format on which an image can be saved onto has changed. Film was the default until digital cameras were released and since then photographs have been saved as files that can be used on computers.
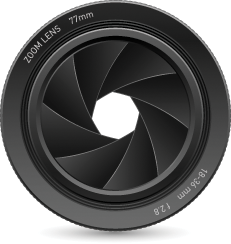

Aperture
 - This is the part of the camera in which light passes through, leading to the sensor or film depending on the type of camera. The size aperture can be changed by the photographer in order to let more or less light in, depending on the desired shot.

Exposure
 - The exposure is the moment that a photography is taken after being exposing the sensor to specific light for a specific amount of time. The exposure can be controlled with settings on the camera, specifically the size of the aperture, the shutter speed and the ISO. There are multiple settings on the camera that will allow the photographer to change the exposure which are setting the camera to Fully Auto (in which everything is automatic), Program (in which everything is manual), Av (Aperture Value) and Tv (Time Value). These settings can be picked based on which is the section of the exposure that you manually want to change. In case you wanted to take a specific effect or image, other settings such as Portrait, Sports and Landscape can also be picked.

Lens and Composition
 - The lens of the camera and the part of the camera that focuses the light in order to view the image before taking. Using a different lens will give the photographer a different image. A DSLR camera has the ability to change the lens. The composition is what is actually seen in the image. The composition of an image is about how the shot looks and how the objects/subjects in the image are organised and put together. The photographer can also change the focus of the image. They can use focus to emphasize the subject of the image as well as blur the background. Cameras have the option for either manual or auto focus. Auto allows for an easier time with photography with manual focus more useful for film.

Saving the Image
 - With digital cameras, it is now easier to save an image you have taken however it cannot be viewed or printed without first being transferred to a computer. Images can also be edited or enhanced on software available on computers such as Photoshop. Photographs are now saved automatically to SD Cards placed inside the camera which is the main way of transferring them to computers.

Image Task:
 - For our first task, we had to taken profile images of our peers conveying different emotions and also using different angles.

 Link to Session 1 Photos

This was our first time using the cameras in lesson and it was a good exercise to incorporate the basics that we had just learnt as well as refresh our photography skills that people may have had before the topic. I only had minimal experience but I knew what to do based on the topics we learnt.

We were also tasked, outside of class, to take images of objects taking on the form of letters.

 'L'

 'P'

'X'

'i'